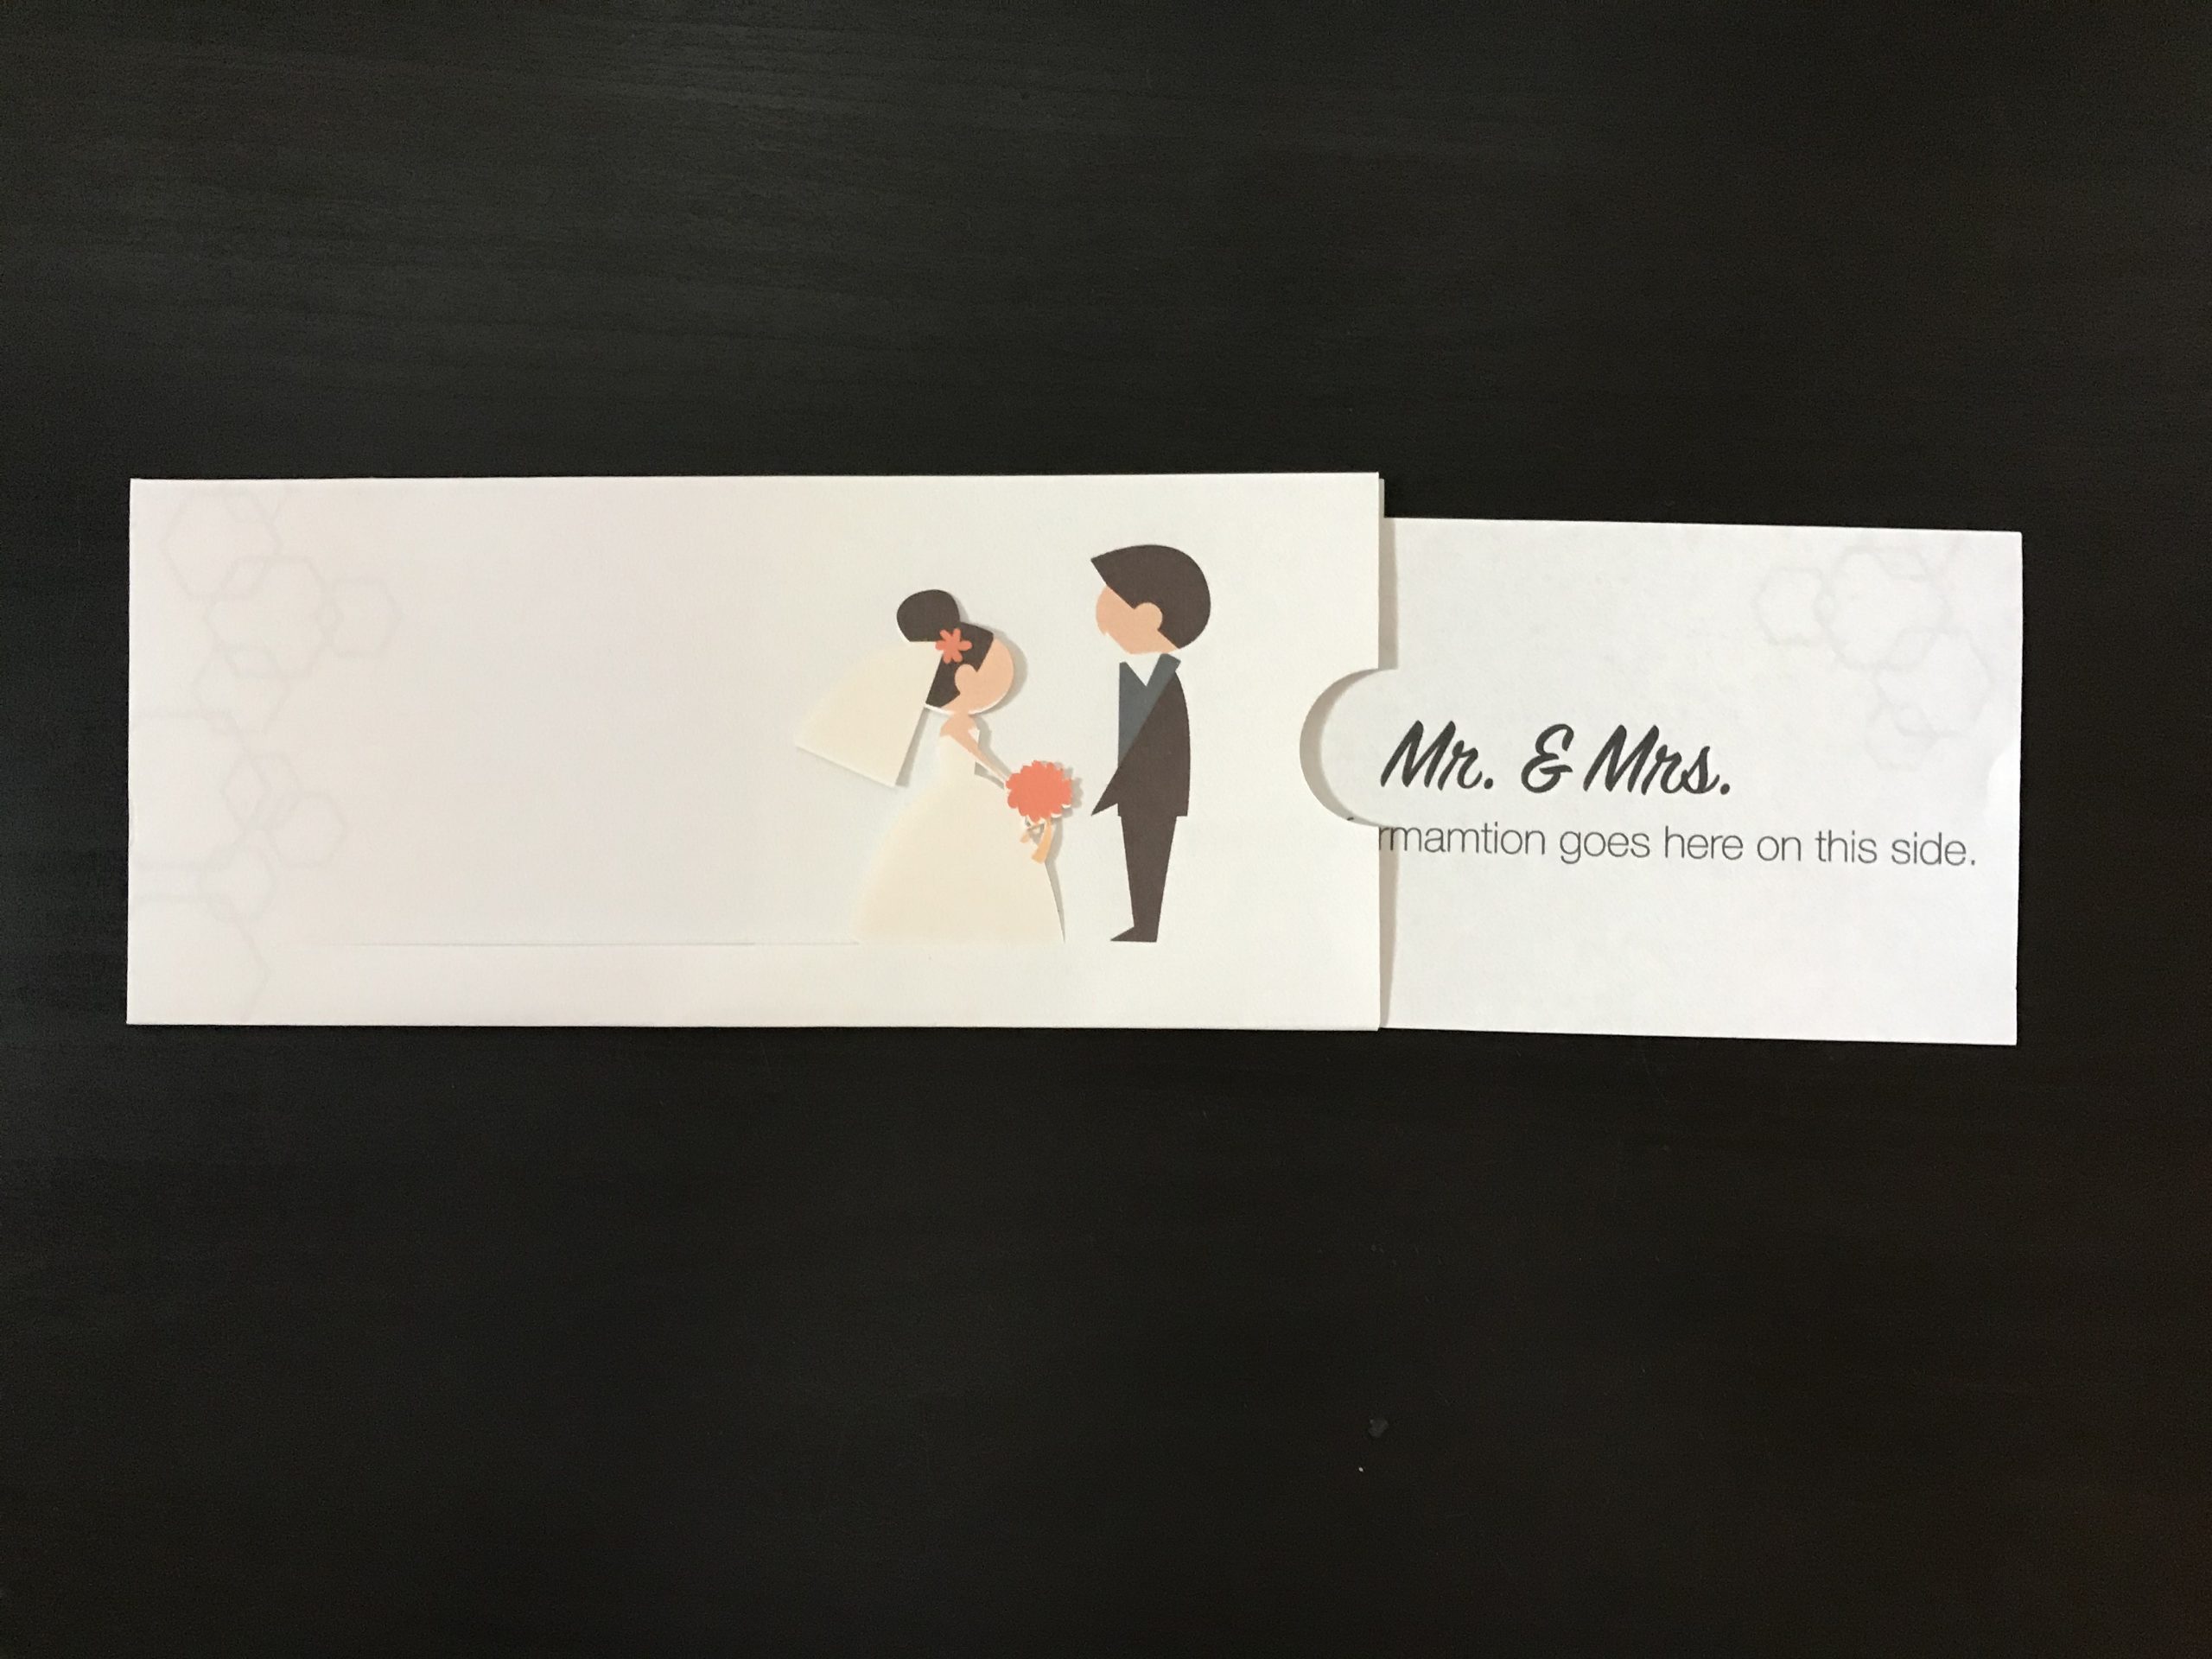


Slide out card is a fun invitation/save the date idea that you can DIY on your Cricut. I’m going to show you my process as I put this template for you (this was my first test run in putting this together).
At the end you’ll find the template that you can upload to Cricut and add your designs there.
Front of the template is the one that you’ll need to add your graphics to and change the Cut lines to Score lines.
STEP 1 – Working with layers
Ungroup the top layer. This will allow you to work with other layers easily.
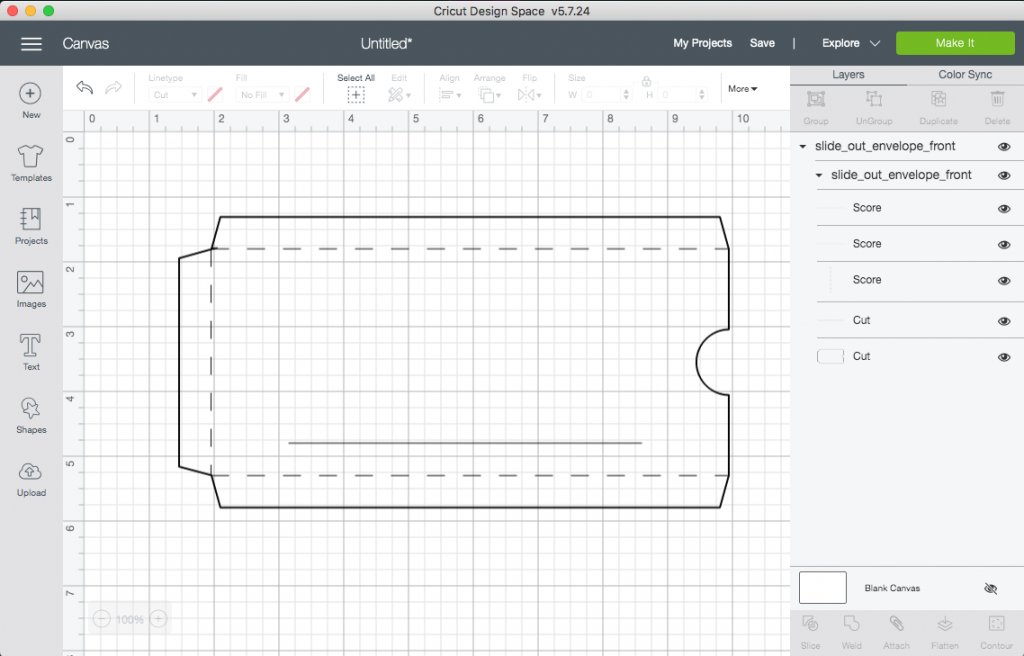
STEP 2 – Score lines
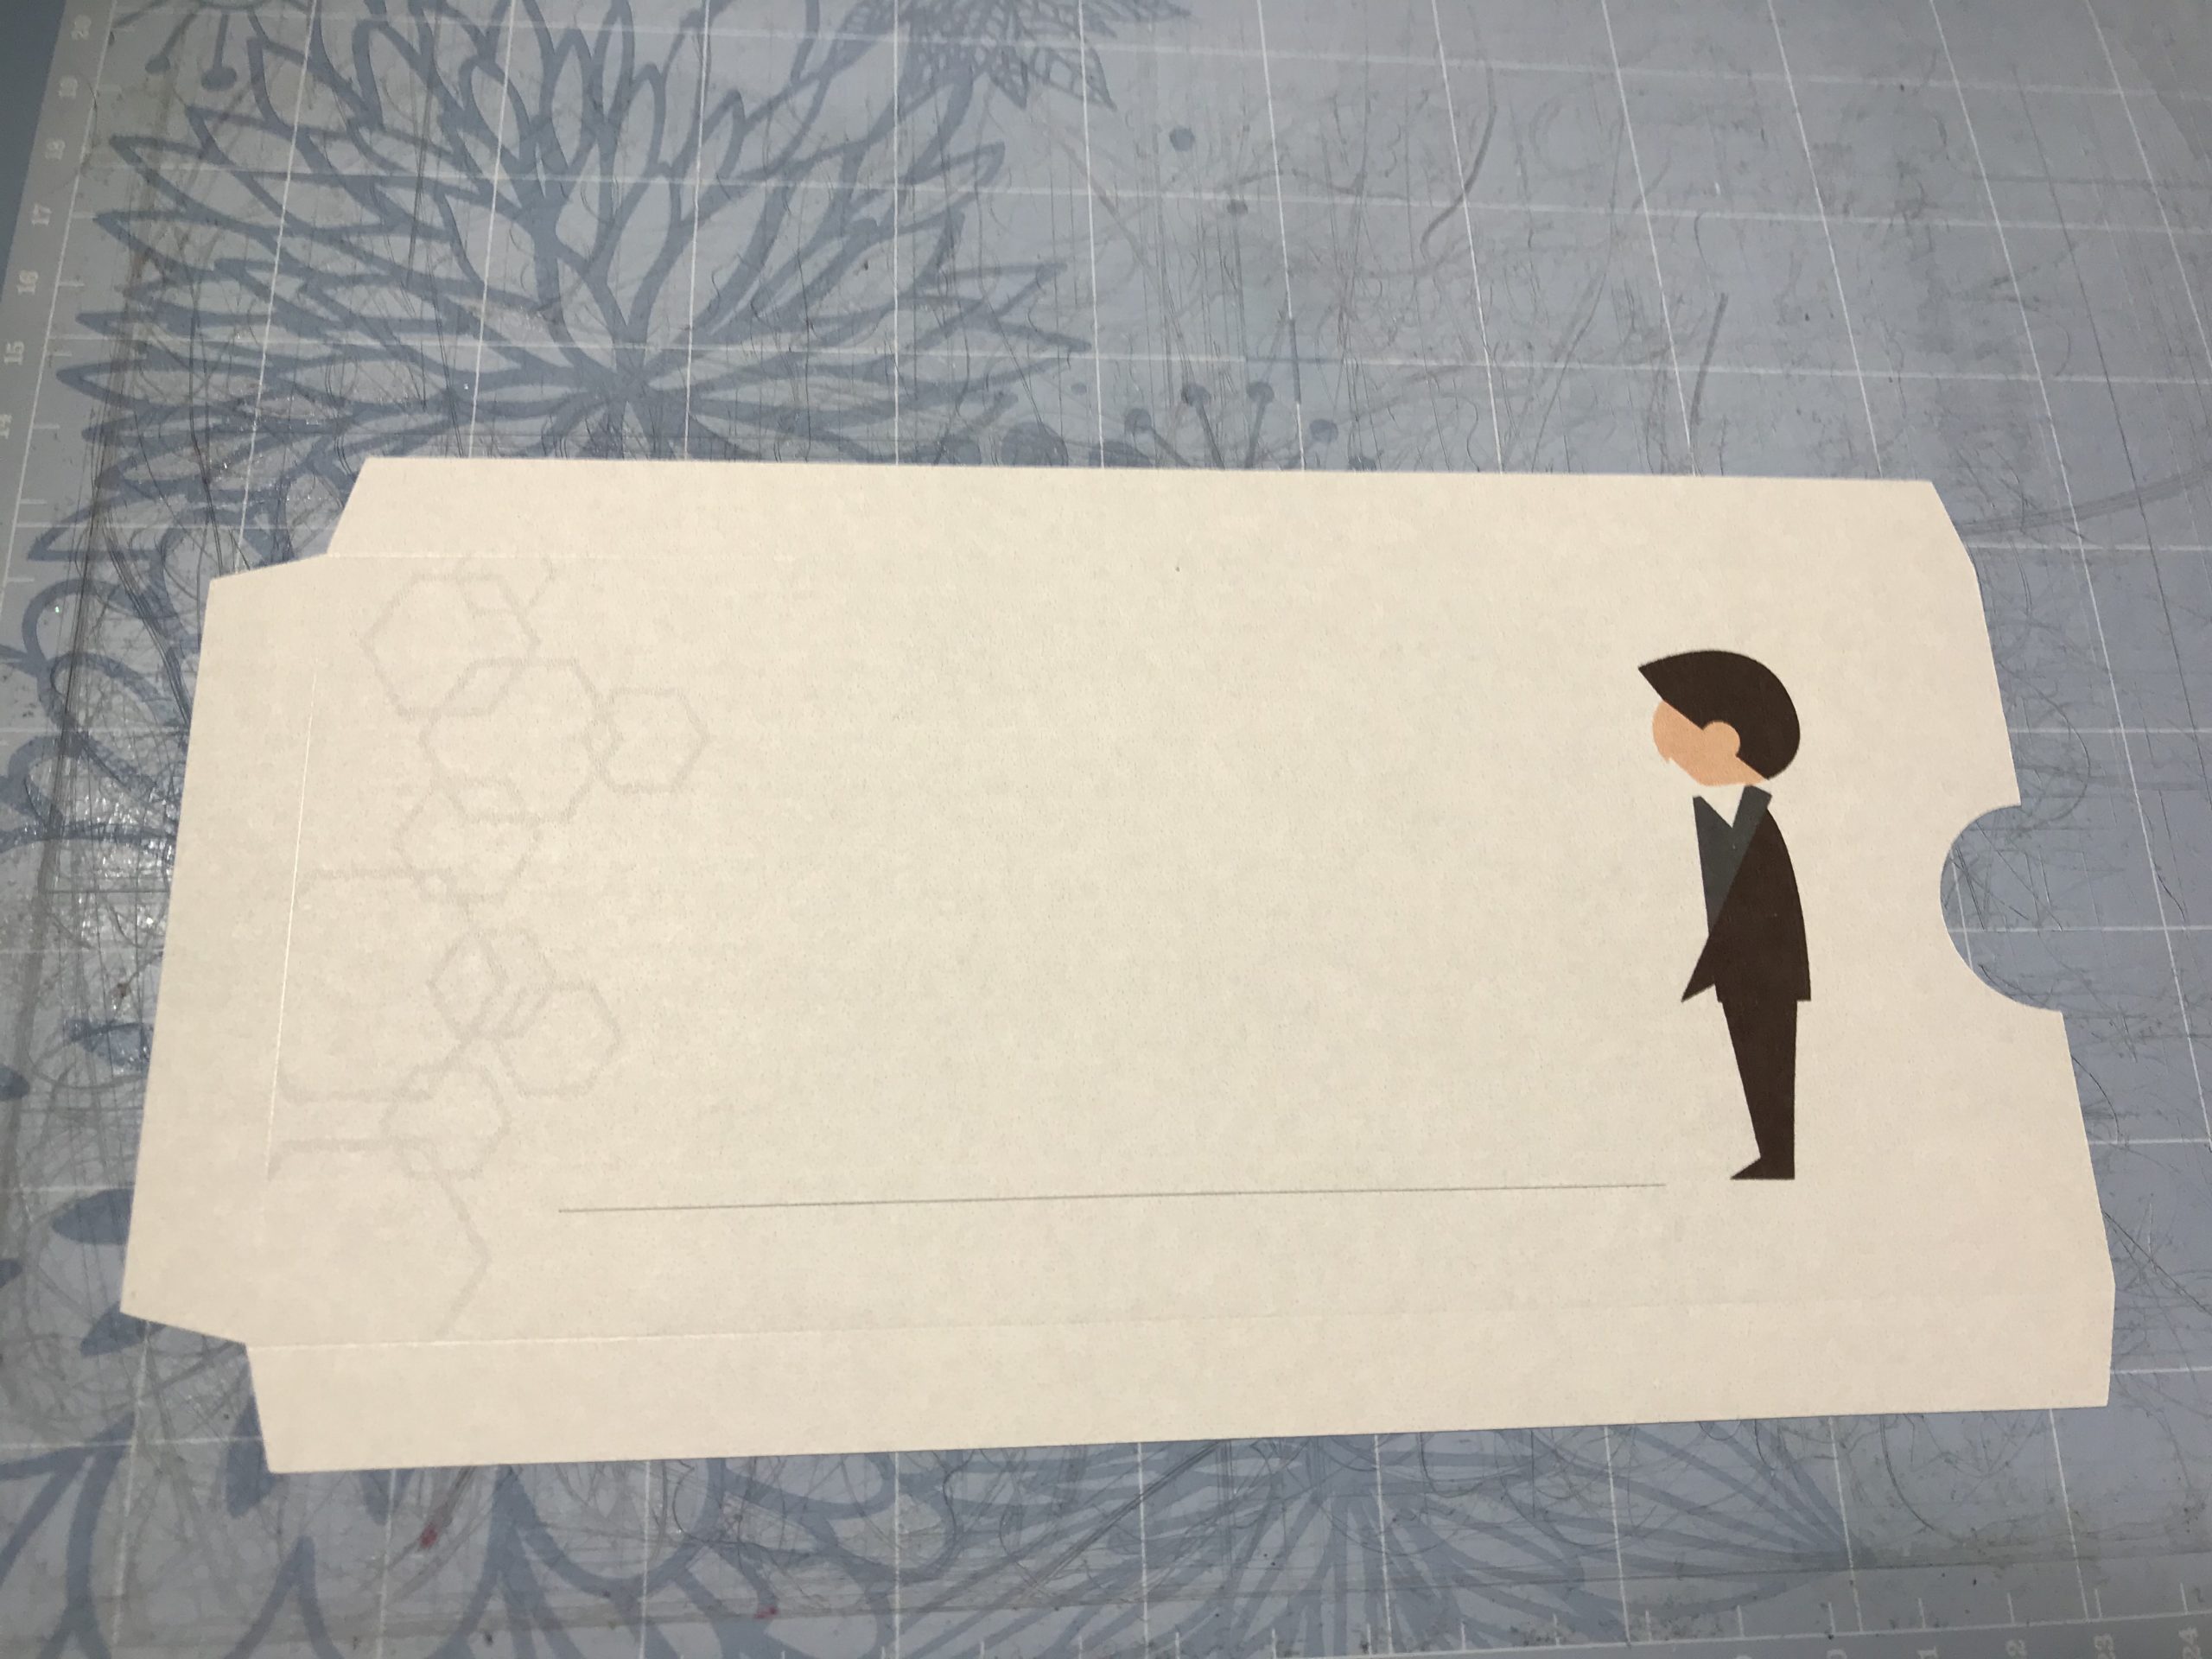
Select the 3 layers with lines that you’ll need to change to Score. This is for the sides also known as flaps where the envelope will fold. These lines are shown in the photo above as dashed lines. In top, left-hand side of your screen where it says Linetype, choose Score from the drop down menu.
STEP 3 – Add your design
Now you’re ready to add the groom or any other decorative designs and your text. When done select all layers EXCEPT the score lines and the slit line (the line that will make the bride go back and forth) and hit Flatten in the lower right-hand corner of the screen.
STEP 4 – Attach ALL
In this last step, it’s VERY IMPORTANT to make sure that you select ALL layers and click Attach from the lower right-hand corner of your screen. This will ensure that all your designs, the score lines and the slit cut line will stay together where you placed them.
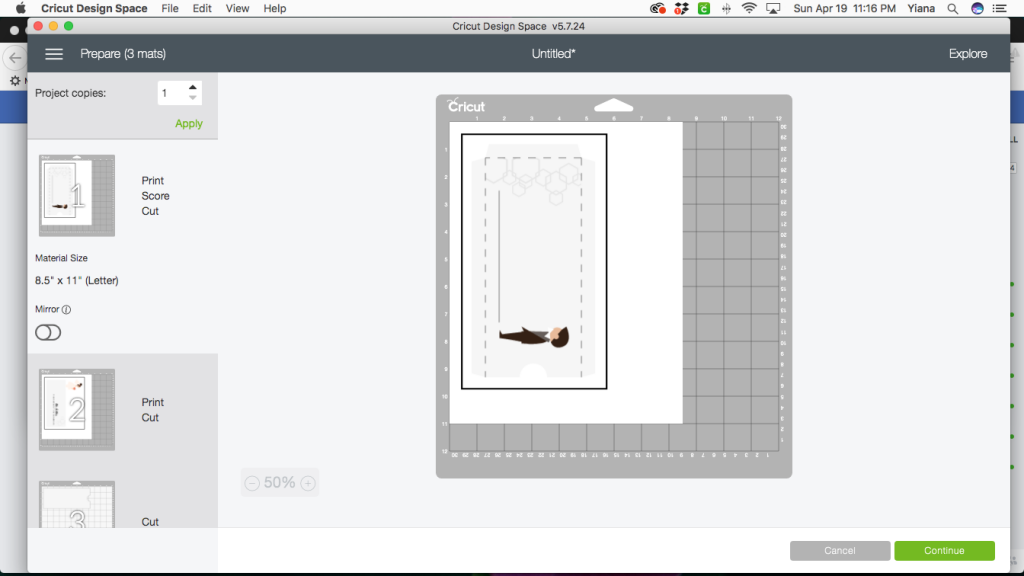
STEP 5 – Print then Cut
Go to the green button at the top of your screen and click Make It. Be sure your printer is on and ready.
Print then Cut restrictions
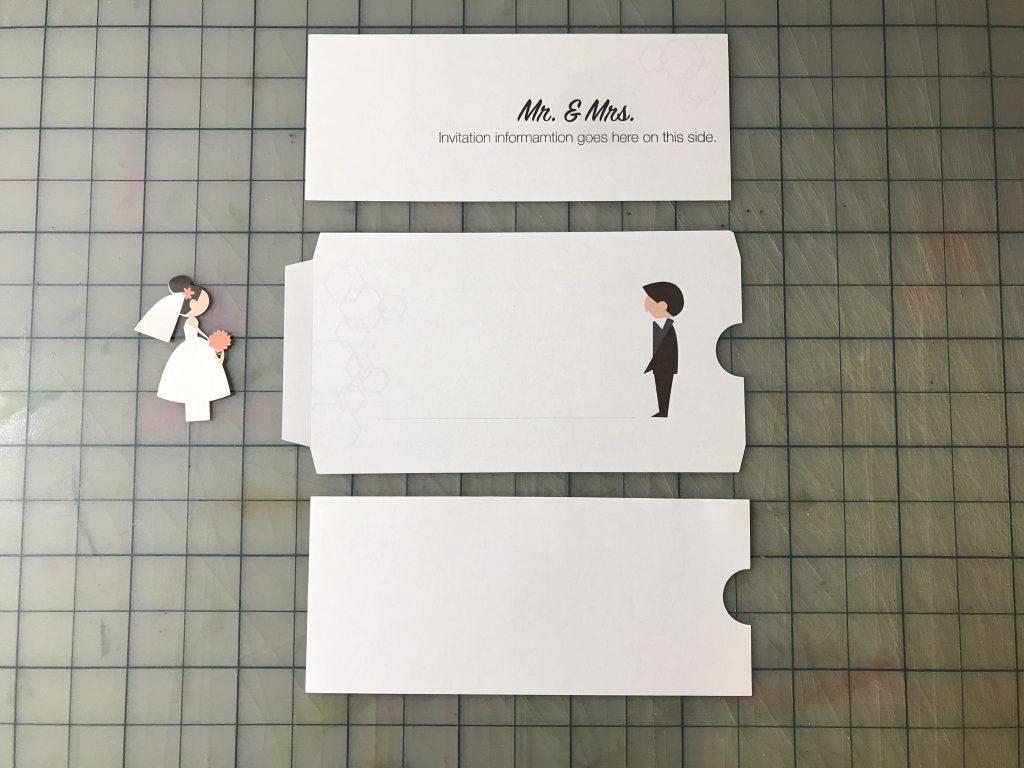
To make this design work with the Print then Cut feature of the Cricut, I had to break it up into 3 main pieces. Cricut currently has a restriction of 9.25″ x 6.75″ area and only allows to use a letter size sheet (8.5″ x 11″). This is because most common home printers only go up to a letter size page.
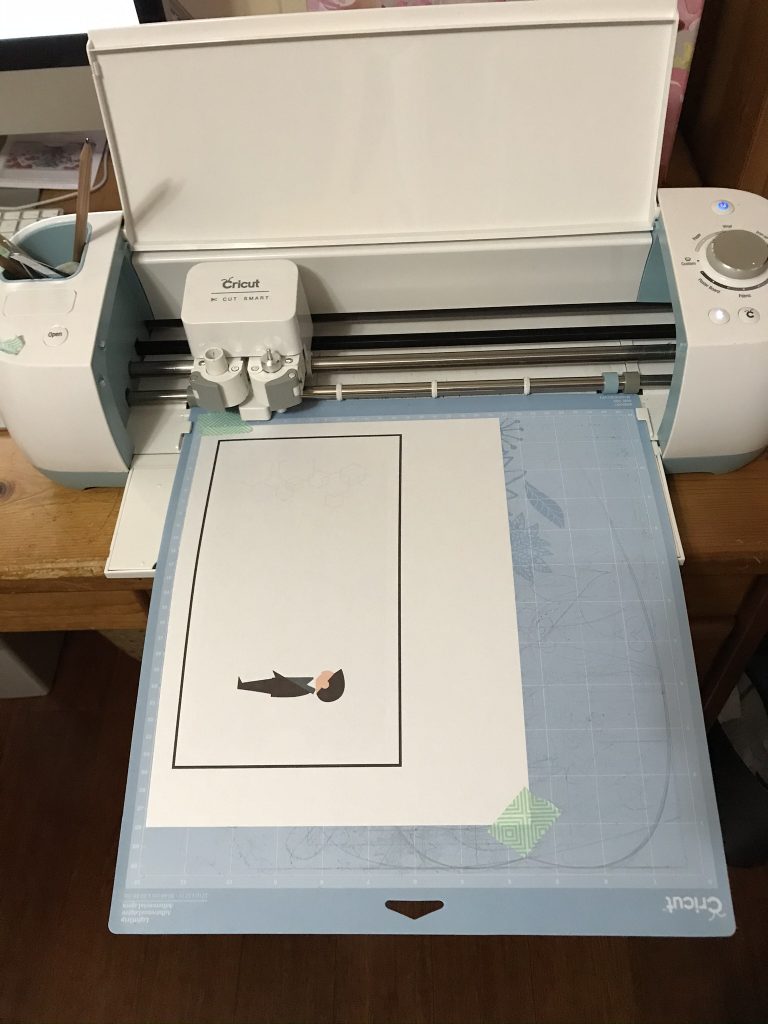
After your design is printed on your printer, make sure that you place the sheet of paper the same way Cricut showed you on the preview screen.
The black lines are there for Cricut to scan the area that needs to be cut.

To save on paper, I placed the insert piece and the bride on the same page. Play around to fit the placement of your bride piece to stay within the guidelines of the Print then Cut area.
https://youtu.be/idR78eVxemA
Here’s a video of how it all comes together. Hope this was helpful. Please let me know if you have any questions.